All posts by DHadmin

Adding taxonomy

Adding taxonomy determines placement but also allows readers to view content related by topics more refined than categories.

  • Select the article in the MWC
  • Navigate to the web tab in article properties and locate the taxonomy area.
  • Click add.
  • Browse or search for relevant terms, highlight them, click add, then OK, then Apply.

Adding maps to articles

Adding maps to articles as well as a map of stories with location information can all be done in a few easy steps.

  • In a web browser, go to latlong.net and search for your location, or simply search Durango or Cortez Colorado to get you in the general area.
  • Click on the map to identify a specific location, click the pin to display latitude and longitude and copy these coordinates.
  • Go to the article properties in Saxotech Editorial and find the Geo-location area under the web properties tab for your article.
  • Paste the latitude and longitude in the appropriate areas and add a ‘Label’ and ‘Data’ which will populate the map info windows.
  • To add more points on the map, click add in the properties.


Sending gps coordinates for use online

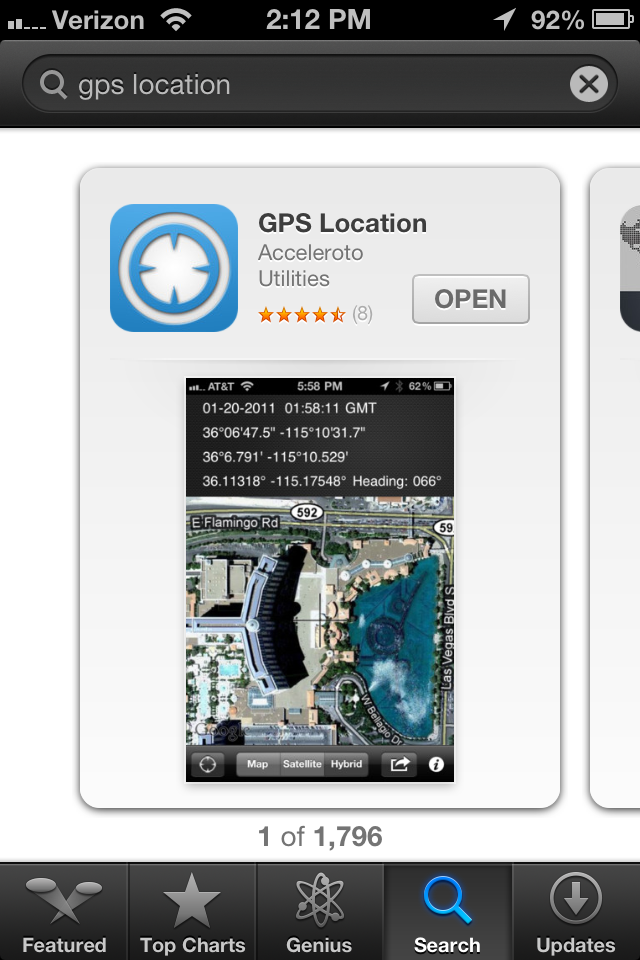
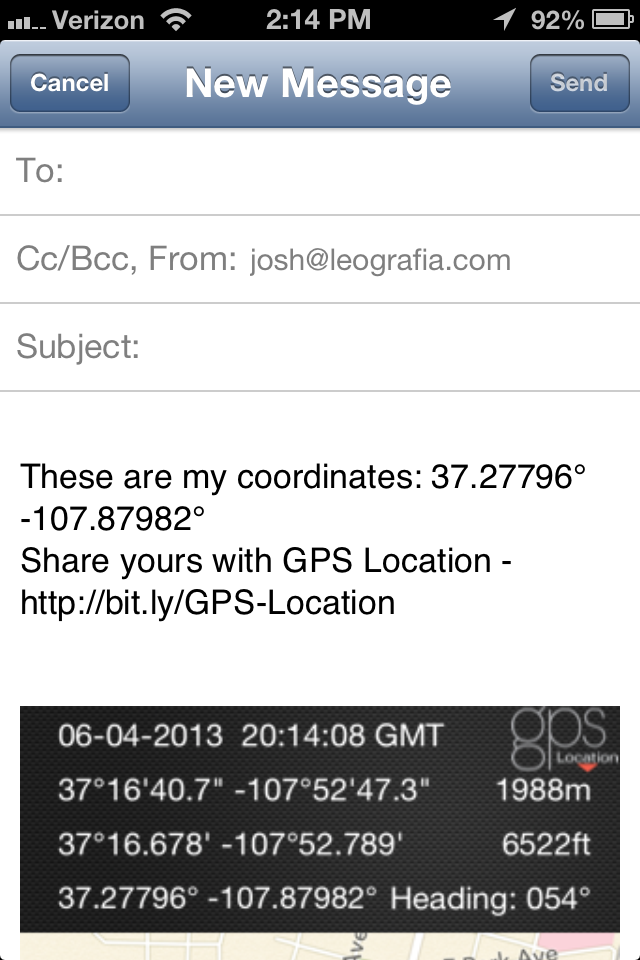
Photo Jun 04, 2 12 08 PMPhoto Jun 04, 2 12 48 PMIf you are using an iphone, go to the app store and search “gps location.” The first listing should be an app by the same name as pictured here. Purchase the app for 99 cents at the time of this writing.

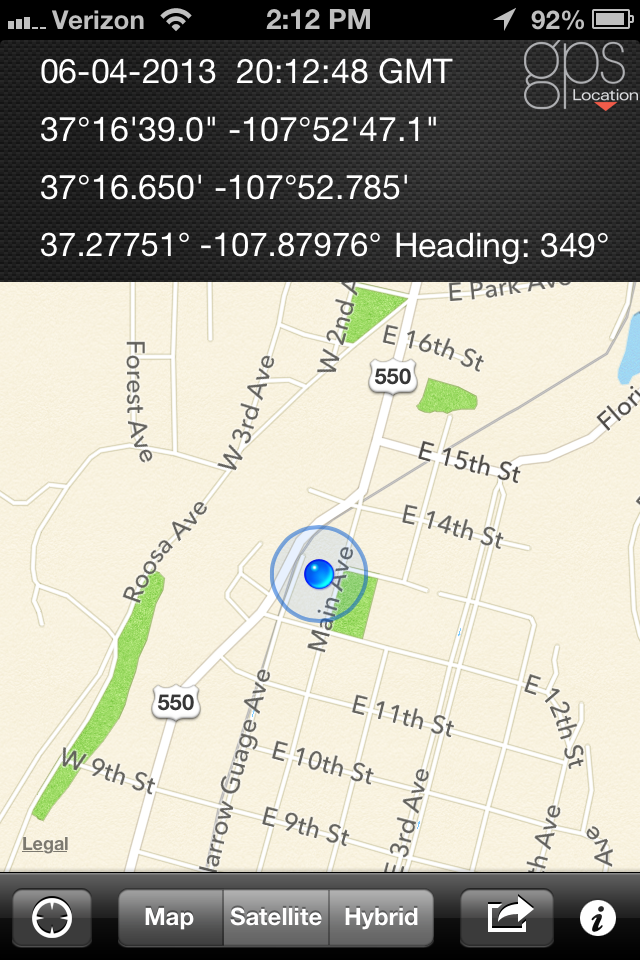
Once open, you can tap the icon in the lower left to find your location.


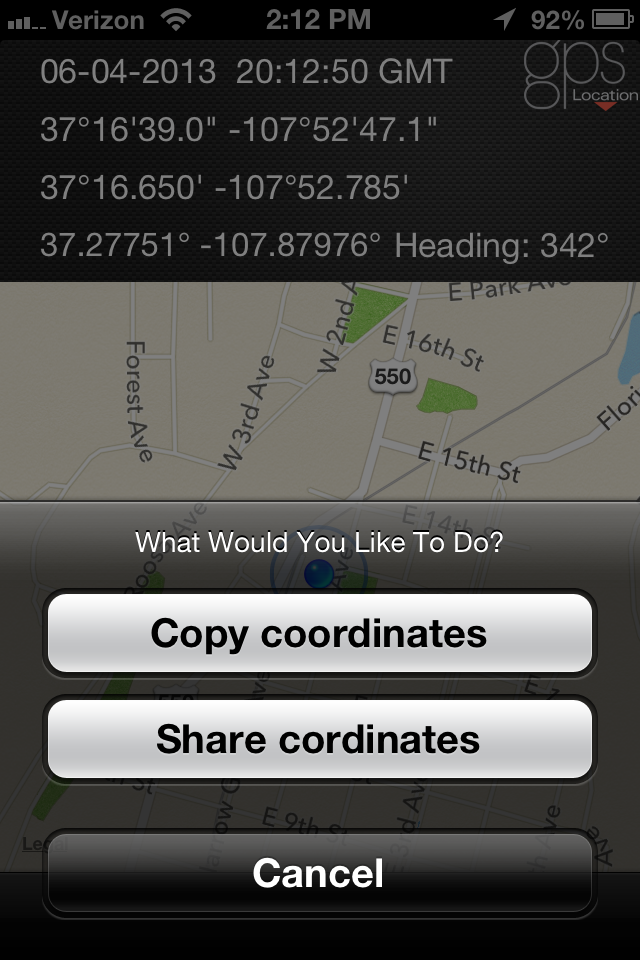
By tapping the icon in the lower right (a box with an arrow coming out of it) you can share via text, email or other options. For our purposes, you will likely share via e-mail to editors working on the story or online presentation of it.

Photo Jun 04, 2 12 50 PMPhoto Jun 04, 2 14 17 PM

Adding related documents

Adding related documents and PDF’s is a great way to quickly and easily add additional online content. Follow these simple steps.

First, make sure you’re working with a pdf, word or excel document. Many times, things like maps are in fact image files. If what you have is an image, simply make sure it is a .jpg file and link it as you would any other photograph.

Save the PDF or .doc file somewhere easily accessible on your computer.

Name the file something that readers can see and make sense of.

Open your Saxotech FTP connection and drop the file in the folder titled DU7 Assets Drop.

In the MWC, select assets for one of the modules and click the plus sign to create a new asset.

In the new asset prompt, title the asset something that makes sense to readers (there is a character limit), browse and select the asset you uploaded where the “Path” field is displayed and make sure ‘copy to default asset folder’ is selected. Click Save.

Without holding any other keys, click and drag the asset to the article.


Editing iPhone video in iMovie

This is a step by step guide to editing video on the iphone, but there is no substitute for simply experimenting. Click on the images below for larger display.
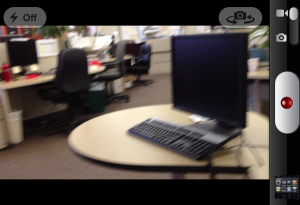
Photo Feb 26, 9 39 40 AM

You will need at least one photo or video clip to begin, so launch the camera. If shooting video, make sure the slider in the upper right is on the video icon and double-tap the screen to shoot in wide-screen. (see right)

Shoot your clip or clips at a minimum of 5 seconds, trying to keep the phone stable.

Next, launch iMovie and click on the + button. Then tap Create New Project.

Once you are here, you can tap the i button for information about the function of all the other buttons. (see below)
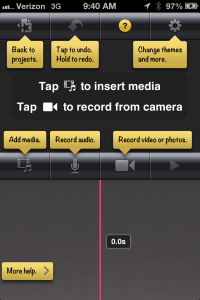
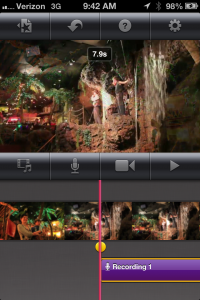
Photo Feb 26, 9 40 55 AM Photo Feb 26, 9 42 56 AM

The first step is to tap the Add Media button, which will allow you to select audio, video or photographs to insert. Start with a video or photograph. With that in place, it is a good time to do your interview with a source. Try to find a quiet place, and with the phone close to the subject, tap the record audio button. Once you start, iMovie will give you a 3-second countdown and begin recording.

You can double-tap elements to delete. Tapping once will provide yellow handles you can use to trim from the ends. (see image to the right) Tap and holding the element will allow you to move it in relation to other media.

If you want to use short clips from your interview, use the trimming handles to select the first clip. You can then tap Add media, tap audio and navigate to the recordings menu to drop the interview on the timeline again, using the trim handles to shorten it to the next piece of audio. The menu options are displayed below.
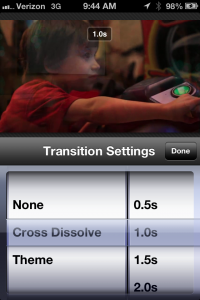
Once you have multiple visuals on the timeline, double-tapping the transitions will allow you to choose the transition type and duration.
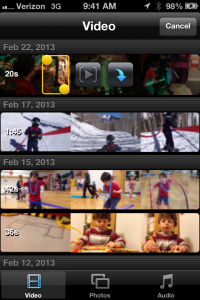
Once you have multiple visuals on the timeline, double-tapping the transitions will allow you to choose the transition type and duration.

From this main Add Media screen, audio can be selected at the bottom right.

From this main Add Media screen, audio can be selected at the bottom right. In this shot, you can also see the ability to select a portion of a clip using the yellow trim handles before adding it to the timeline.
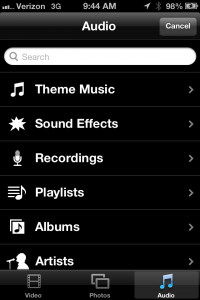
Once on the audio section, select Recordings and find your interview.


After you have your audio, video and photographs where you want them on the timeline, it’s time to export the movie. From the project, tap the Back to projects button in the upper left.

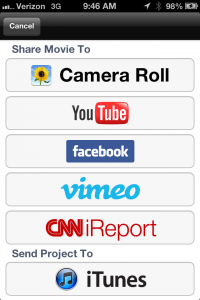
Now, tap the third icon from the right at the bottom of the screen. (A rectangle with an arrow coming out of it seen below.) Select Camera roll as the destination, (center) and choose large quality (right). Uploading video will be covered in a separate tutorial.
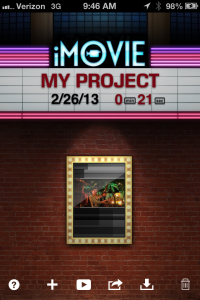
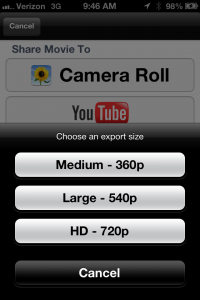
Photo Feb 26, 9 46 04 AMPhoto Feb 26, 9 46 14 AMPhoto Feb 26, 9 46 09 AM

Daily website needs

There are 3 steps to making sure everything displays properly on the website every day.
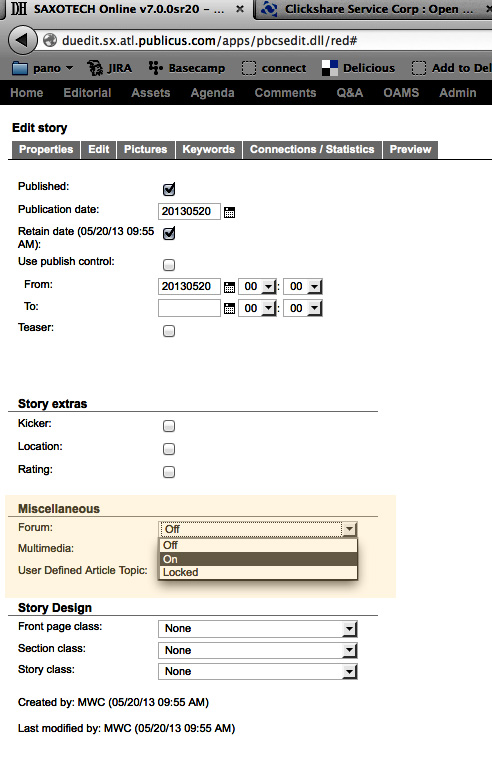
Step 1: This gallery outlines daily taxonomy needs.
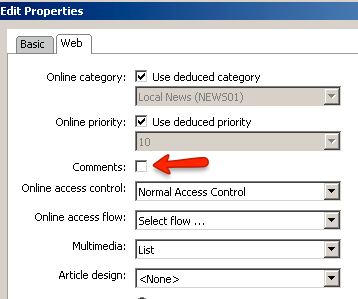
Step 2: Enable comments on appropriate Local News articles.
Step 3: Ensure sections are properly prioritized and articles categorized (all columnists have their own online category).

Occasionally, as noted in the gallery notes, use of Template Themes and Teaser Images is required.

Common posting issues and how to resolve them

If articles are not publishing online, there are a few steps to take to get through the issue.

If a single article will not publish online, try these steps.

  • First, make sure the proper Channel is selected for publication, and try again.
  • If the article has an asset attached (doc, mp3, pdf or video) make sure it is linked without a caption icon between the article and the asset. If a caption exists, cut that link and try again.
  • If the article has the proper channel and a repeated attempt fails, delete any text in the ‘Summary field’ of the article properties and try again.
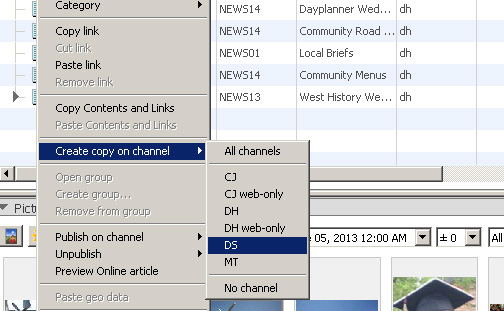
  • If that does not work, right click on the article and select Create copy on channel…(select a channel affiliated with the same pub, so if the channel is DH, select DH web only.) Try to publish the copy.
  • If that still does not work, right click and select ‘copy styles and links.’ Then create a new article and paste the styles and links. Make sure any category, taxonomy and priority information is set on the new copy. Try to publish online.
  • Another issue may be two or more sidebars linked to the article. In this case, and if the article is already linked to a print page, create a copy on another channel. Unlink sidebars, leaving only one. Create factboxes or related articles in place of the sidebars and link them to the main article. Publish

If no articles are publishing online and MediaWare Center is showing only green arrows that never turn to check marks, notify a ‘super-user,’ who can call Saxotech. They will need to tell Saxotech that you have an editorial issue. They will get an editorial customer service representative on the phone and fix it. (If you want to feel fancy, tell them you think they need to recycle the app pools because it appears mwp/ows is down.)


Adding related articles

Adding online links can benefit readers, reporters and website traffic.

Take these steps:

  • Select the article
  • Go to the work menu and select ‘Add online/online links.’
  • Ensure that the proper publication channel is selected.
  • Select a category if the search needs to be narrowed.
  • Select a date range if desired.
  • Add a search term in the text field.
  • After clicking the search button, select related articles and click ‘Add.’
  • Once articles are added, click ‘OK.’

Give the website a makeover with a few clicks

With a few clicks in the online edit interface, you can give the homepage of the website a new look. Follow these easy steps.

1. – In the online edit interface, go to the Miscellaneous tab and drop down to “Template Theme”

2. – Select the appropriate theme using the options below, and click “Activate Selected.”

3. – Go to the article list and recache the homepage to reflect the new design. (Occasionally, the template theme takes several minutes to change) Click on the images below to enlarge.

Making it easy for readers to buy photos

With the simple check of a box in article properties, readers will be given a link to purchase images online.

In the MediaWare Center:

  • Click on the article, open the properties and in the web properties panel, check the box labeled image sales.

If that step was not done, follow these steps to add the ability in the online edit interface.

1. – Click to edit the article

2. – Go to the Edit tab and open the extra fields portion in the right rail.

3. – Change the word ‘False’ to “True” in the photosales area.

4. – Click save and close on the article and recache it.

Below is a step-by-step video

Adding pull quotes

Much like in print, pull quotes can be added to online articles that don’t have images, adding a visual element and drawing readers in to read further down in an article.

Follow these steps.

1. – Find the article in the online edit interface and click to edit the story.

2. – Go to the ‘edit tab’ of the article and open the ‘Extra Fields’ area on the right hand side.

3. – Enter the quote without opening and closing quotation marks, as the online template will add these.

4.- Enter the attribution for the quote in the appropriate text area.

5. – Save, close and recache the article.

Here is a step-by-step video:

Recache of online pages

Pages on the website will re-cache themselves on a timed basis, however if changes to headlines or articles need to be seen immediately, they need to be manually re-cached.

You’ll need to be an editor with permissions to use the Online Edit interface, or online ui.

Each article in the online edit interface has a block of buttons in the left column. Click the third from the left (a small page icon) to re-cache and preview the article.

article cash


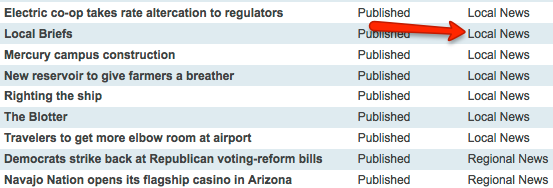
Clicking on the category name will re-cache the index page for that section of the website. For instance, clicking the Local News category next those articles, the Local News index page will be re-cached to show the most recent changes.

section cache


Filter to the current day and click on the “Front page” button to re-cache any changes made to headlines, article order or images seen on the homepage of the website.

homepagerecache

Section front pages (not articles or photo galleries) can be re-cached by typing &nocache=1 at the end of the url, without the trailing slash.

so http://www.durangoherald.com/section/News/

becomes http://www.durangoherald.com/section/News&nocache=1

Changing article display using ‘article class’

If an article has 3 or more images and additional sidebars and fact-boxes, changing article class will add a nice photo-gallery while keeping additional content high on the page. Here’s how.

MediaWare Center
1) select the article and open the properties
2) go to the ‘web’ tab in properties
3) select ‘A no sidebar with photo slideshow’ under design

Online
1) Open the article to edit it
2) In the default Properties pane, select ‘A no sidebar with photo gallery.’

3) Save and close the article and recache it manually.

Sharing between publications made easy

Sharing content between publications is a snap.

Take these steps:

  • Select the article. Articles with linked elements like photos, sidebars and assets will share the entire package.
  • Right click and select ‘Create copy on channel.’
  • Select the publication channel.
  • The elements should now be in the local editorial system of the receiving publication.

NOTE: If you simply add channels to an article, any edit will be reflected across all publications which may cause problems for others using the article, so creating copies on different channels is the preferred method.

channelcopy

Uploading video and linking it to an article

An account to upload videos in the Castfire system is required. If you need an account created, see the Photo/Video Manager.

Follow these steps:

Log in to Castfire

  • Select the correct ‘Content Producer.’ (News, Sports, etc)
  • Click “Add Show” to upload your video, giving it a title and selecting the video channel in the media type in the ‘Channel’ drop down.
  • Add or select a poster frame and add any keywords that match the content.
  • If the video is with a centerpiece news article, click ‘Frontpage’ under ‘Syndication partners.’

Log in to Saxotech

  • Go to the Assets module and select File/Create New/URL Asset.
  • In Castfire, go to the Profiles tab and copy the 768kbps m4v URL.
  • In Saxotech, paste this URL in the new asset window URL field and give the asset a name.
  • Go to the general properties tab for the new asset and select Castfire for Asset type, then click save.
  • Without holding the ‘control’ key, click and drag the asset to the article.
  • Select the article properties and make the following changes.
  1. Go to the ‘Web’ tab and select ‘Embed Left’ in the ‘Multimedia’ field.
  2. Go to the ‘Keywords’ tab and add a taxonomy of ‘Video.’

NOTE: If the video is a standalone video, you must create an article with a headline and link either a photo or a teaser image.

Click here to learn about linking teaser photos.

Adding online priorities

The importance of priorities, 1 – 2 – 3 clicks away.

Take these steps:

Select the article and open the Properties panel to the ‘Web’ tab.
Click 1 – Next to ‘Online priorities,’ uncheck the box ‘Use deduced priorities.’
Click 2 – Select a number 1-10 in the drop down window.
Click 3 – Click the apply button to confirm the changes.