This is a step by step guide to editing video on the iphone, but there is no substitute for simply experimenting. Click on the images below for larger display.
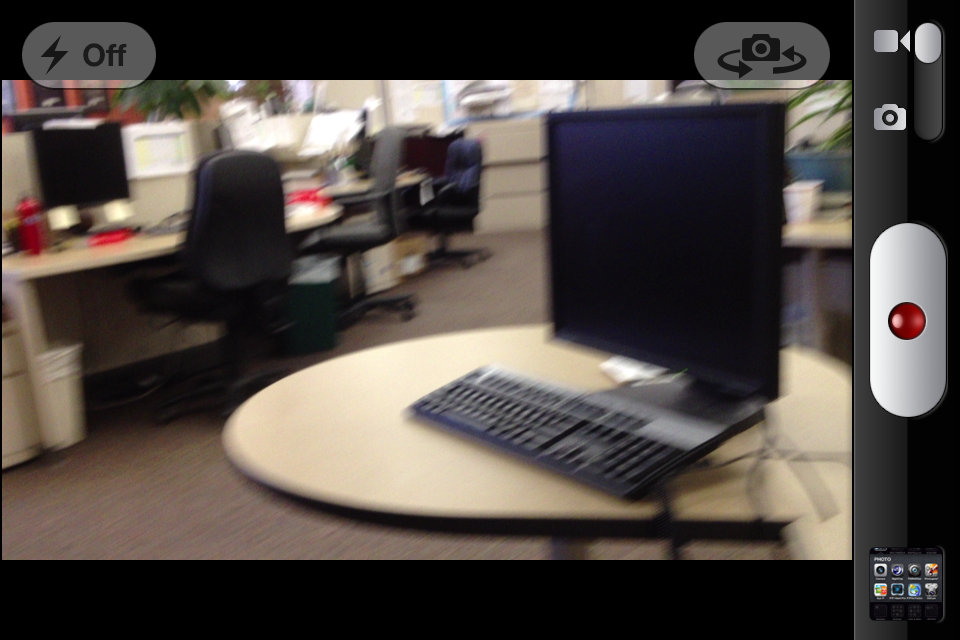
You will need at least one photo or video clip to begin, so launch the camera. If shooting video, make sure the slider in the upper right is on the video icon and double-tap the screen to shoot in wide-screen. (see right)
Shoot your clip or clips at a minimum of 5 seconds, trying to keep the phone stable.
Next, launch iMovie and click on the + button. Then tap Create New Project.
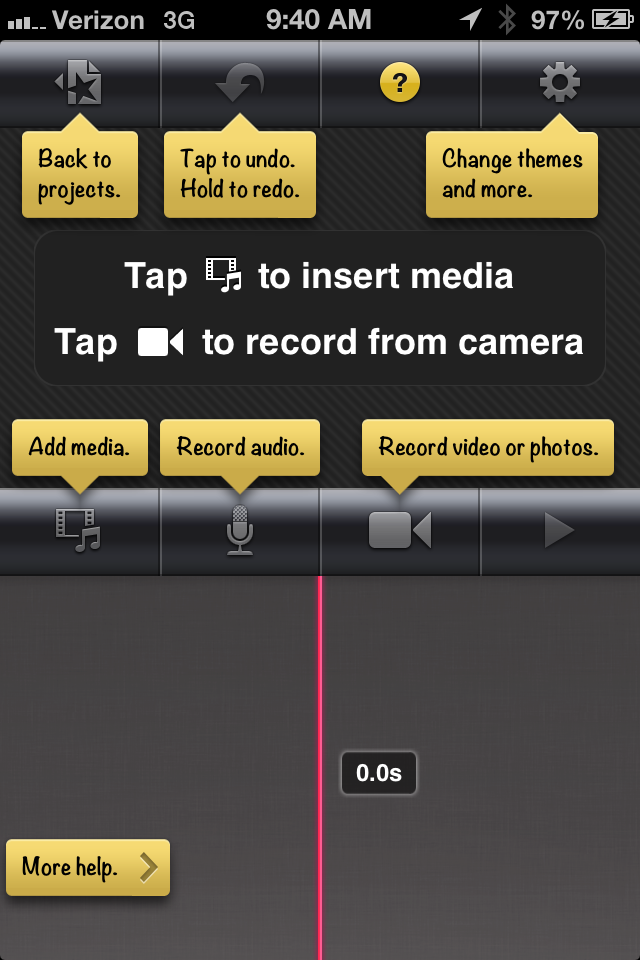
Once you are here, you can tap the i button for information about the function of all the other buttons. (see below)
The first step is to tap the Add Media button, which will allow you to select audio, video or photographs to insert. Start with a video or photograph. With that in place, it is a good time to do your interview with a source. Try to find a quiet place, and with the phone close to the subject, tap the record audio button. Once you start, iMovie will give you a 3-second countdown and begin recording.
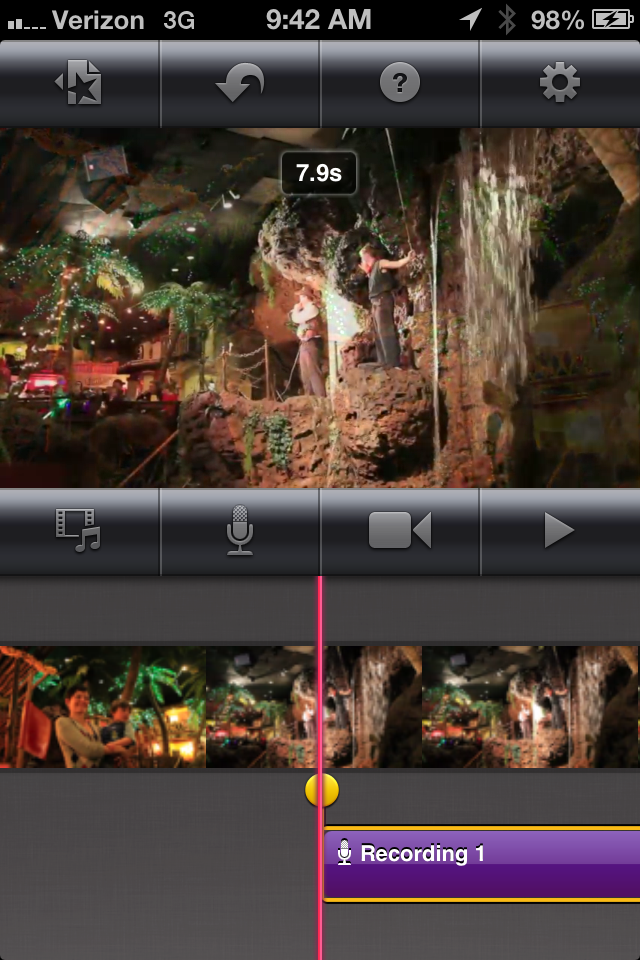
You can double-tap elements to delete. Tapping once will provide yellow handles you can use to trim from the ends. (see image to the right) Tap and holding the element will allow you to move it in relation to other media.
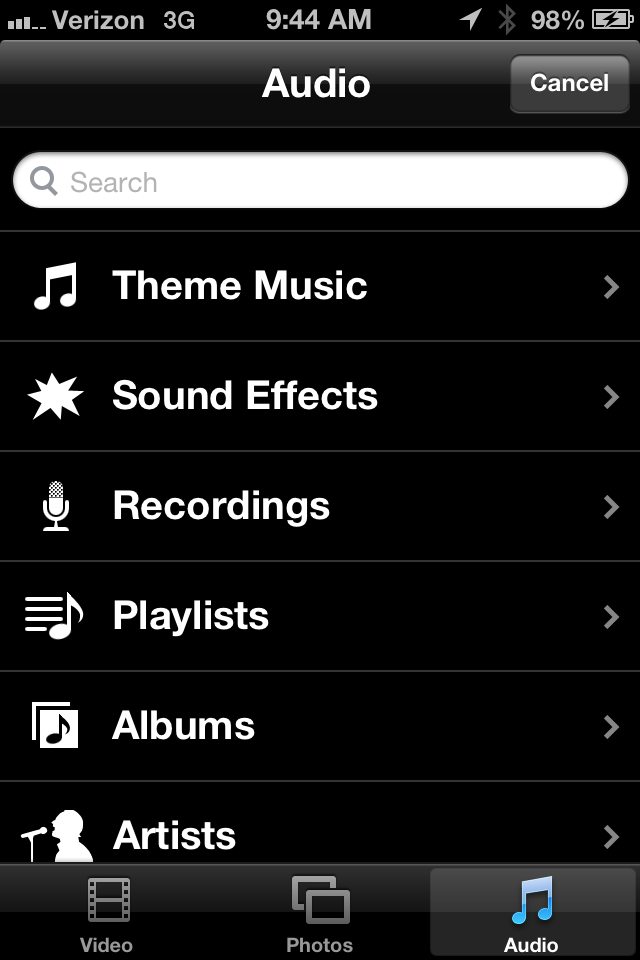
If you want to use short clips from your interview, use the trimming handles to select the first clip. You can then tap Add media, tap audio and navigate to the recordings menu to drop the interview on the timeline again, using the trim handles to shorten it to the next piece of audio. The menu options are displayed below.

Once you have multiple visuals on the timeline, double-tapping the transitions will allow you to choose the transition type and duration.

From this main Add Media screen, audio can be selected at the bottom right. In this shot, you can also see the ability to select a portion of a clip using the yellow trim handles before adding it to the timeline.
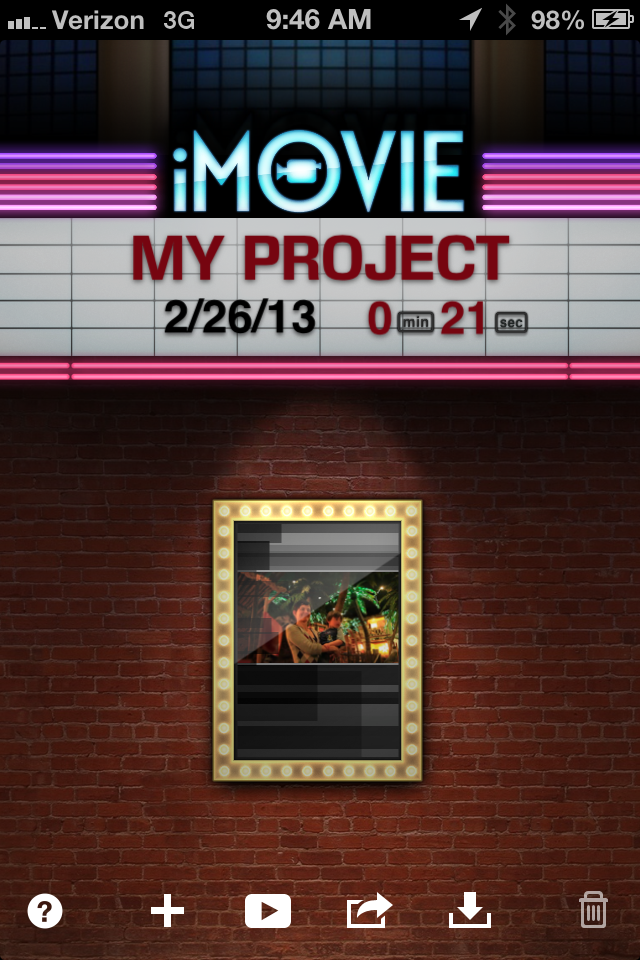
After you have your audio, video and photographs where you want them on the timeline, it’s time to export the movie. From the project, tap the Back to projects button in the upper left.
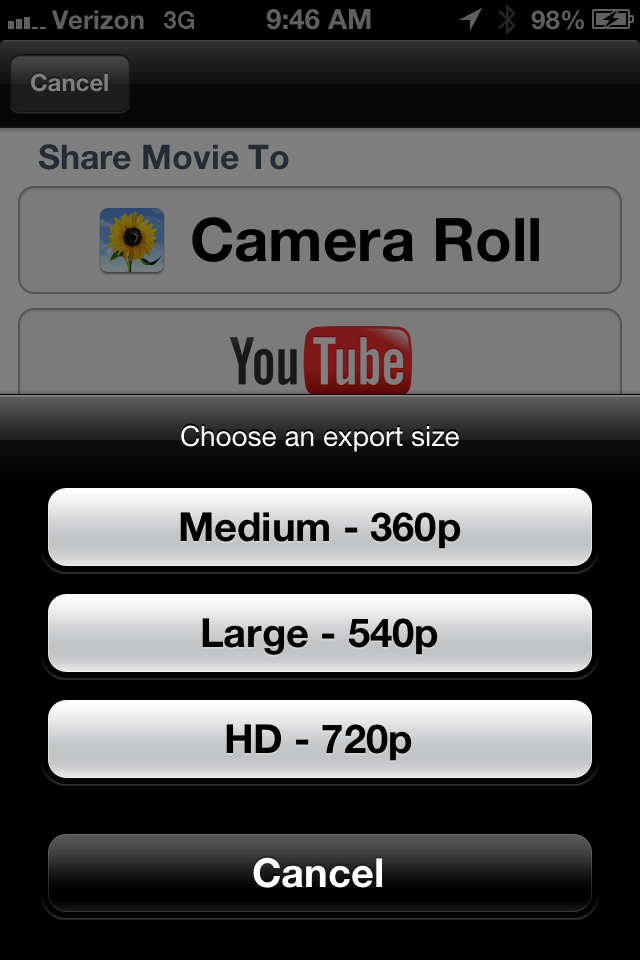
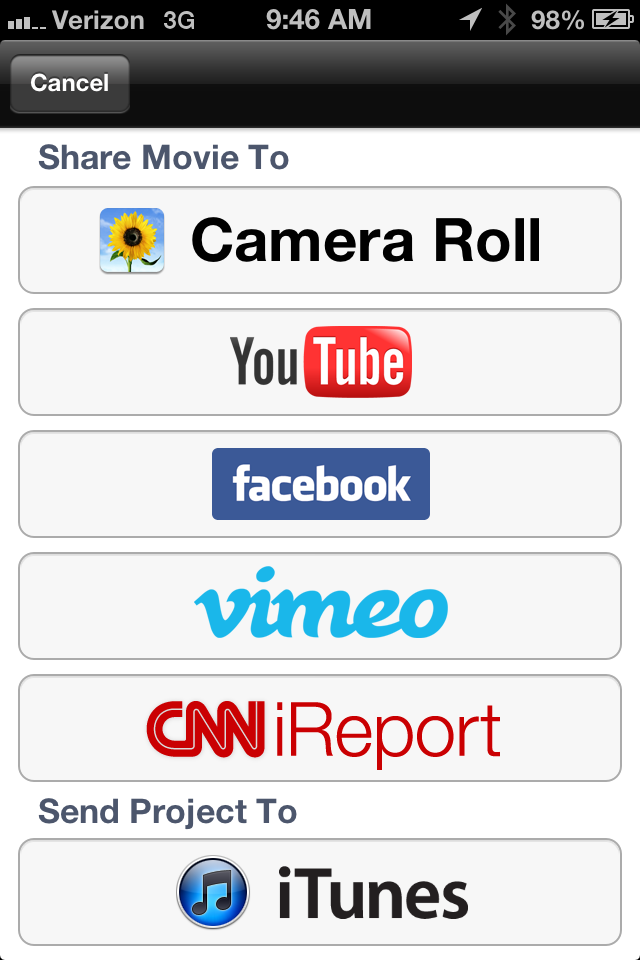
Now, tap the third icon from the right at the bottom of the screen. (A rectangle with an arrow coming out of it seen below.) Select Camera roll as the destination, (center) and choose large quality (right). Uploading video will be covered in a separate tutorial.